[ Photoshop tutorials ] If you want to render any kind of frosted glass, you have to think about to notable increase of rendering time.
My personal solution is to render "normal" glasses with our render engines, and after abtain any kind of glass playing with Photoshop. You could be make many kind of Glasses in few seconds!
-
Think about Photo-retouching time
A software like Photoshop could be very, very helpfully to refine scenes: stop to make 3d images directly with your 3d studio max or Maya... think your render as a first part. The second one will be the photo retouch!
To save your time think to photo retouch especially frosted glasses. I'm showing to you my test:
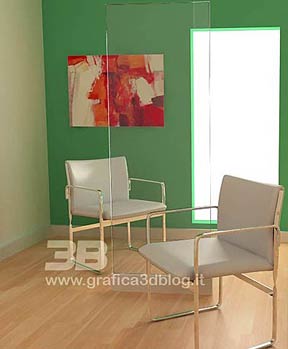
My scene sample has same important elements to evaluate the method:
- A chair in front of the Glass
- A chair behind the Glass
- A colouder square
- A strong light
So we will verify if this method can solve any situation.
-
How to use Photoshop Masks
Especially if we have an object behind the Glass the best solution is to use a mask.
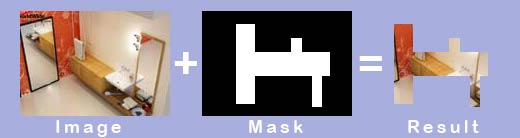
But what's exactly the mask? How to use it?
The Masks are images, usually in white/black, that we use to say to photoshop (in this case!) what is visible and what is hidden. White = visible, Black = hidden.
Here two examples to understand perfectly how works a mask:

But... why do I have to use a mask?
Because it's very easy and fast obtain a mask if you have access to the 3d scene. You have just to put a black material to all the objects in the scene, just the glass will be white.
So render a second image: interno_mask.jpg
This is a mask image related to our scene sample: 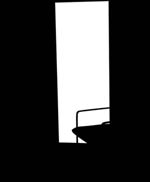
Image name:
interno_mask.jpg
This will be the mask that we use to select and manmipulate easy our glass.
Now combine two images and obtain in photoshop something like the image below following this points:
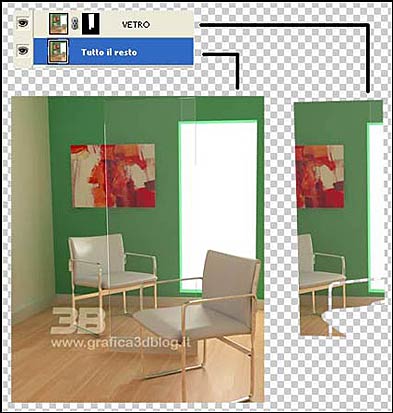
1 - Open both the images
2 - Go to interno.jpg and double click on Background to convert it in layer
3 - Layer > Duplicate Layer
4 - Layer > Leyer Mask > Revel All
5 - Image > Apply Image,
In the rollout "source" choose interni_mask.jpg
Layer order could be this one in the left image.
-
Combine the effects
Now we have two leyers, select the glass layer and play with fantasy! :)
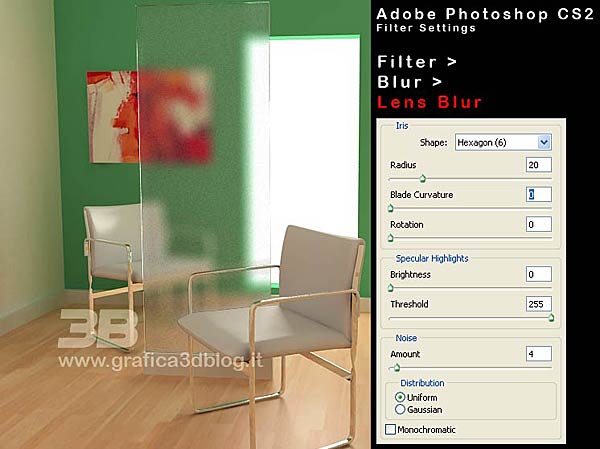
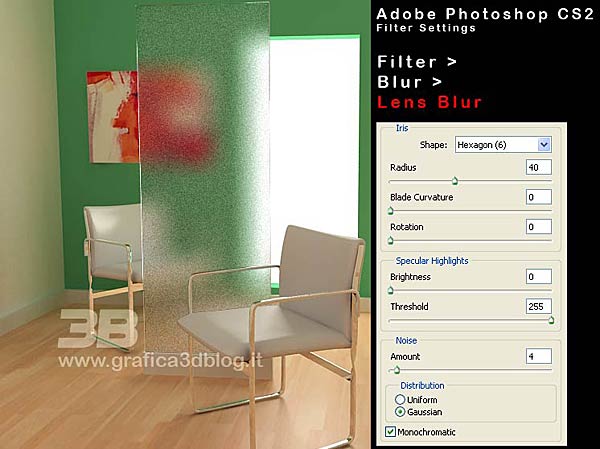
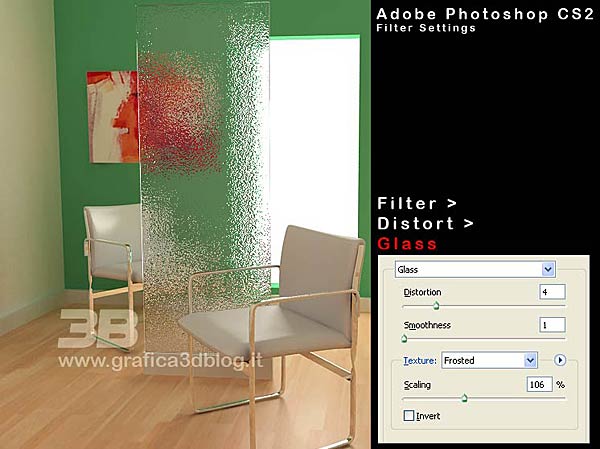
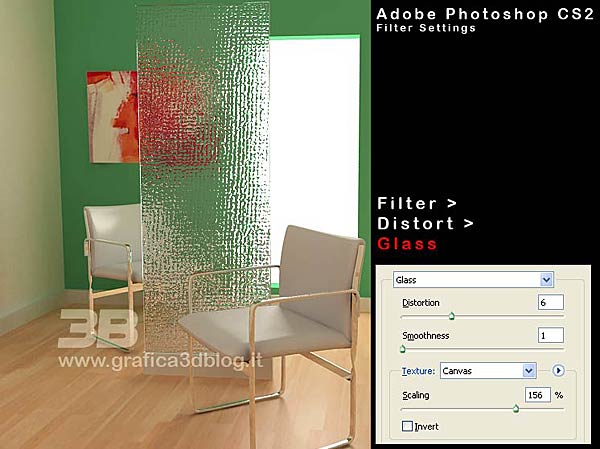
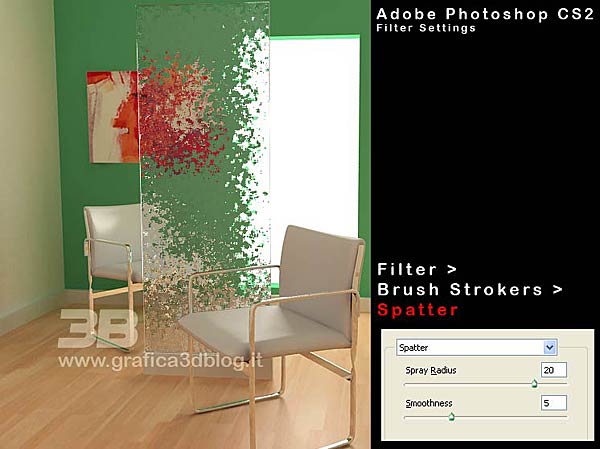
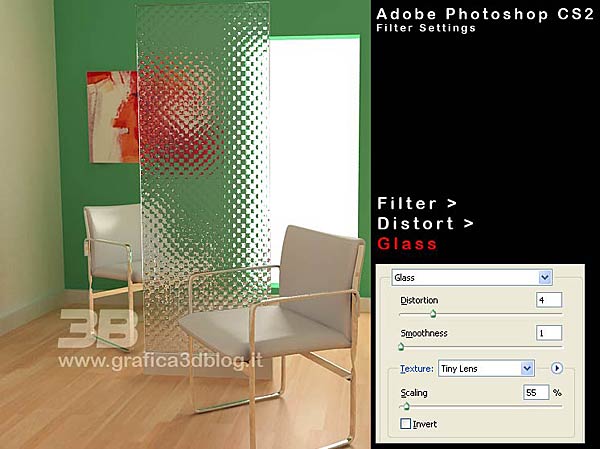
Here I suggest same filter with relative parameters to obtain common glasses. I didn't work to perfect the images so much, my goal was obtain good results without many efforts.
I suggest to use this technic to save your time and to make many different proposition for your client in zero time!
-
Glasses and filter parameters - Photoshop

Did you like this post?
I wrote many other exciting posts on www.cg-blog.com, come in! > LINK